| Parameter | Optimal Range | Critical Threshold |
|---|---|---|
| Germination temperature | 21-27°C | Below 15°C: no germination |
| Light intensity (seedling stage) | 5,000-7,000 lux | Below 2,000 lux: leggy growth |
| Seed depth | 6-8 mm | Deeper than 12 mm: poor emergence |
| Days to germination (optimal temp) | 5-7 days | 10-14 days at 18°C |
| Transplant readiness | 4-6 true leaves | Before 8 leaves: root-bound risk |
| Hardening off duration | 7-10 days | Less than 5 days: transplant shock |
Starting tomato seeds indoors is the single most reliable method for cold-climate growers across Canada to achieve a productive harvest before the first autumn frost. In USDA zones 3 to 5, which cover most of Quebec, Ontario, Manitoba, Saskatchewan, and Alberta, outdoor growing seasons are too short to sow seeds directly in the ground. By germinating seeds indoors under controlled conditions, you gain 6 to 8 weeks of growth time, allowing seedlings to develop robust root systems and multiple sets of true leaves before facing outdoor weather. This guide explains the physiological reasons behind the 6 to 8 week timeline, provides precise frost date calculations for Canadian regions, and details every step from sowing to hardening off, with quantified thresholds for temperature, light intensity, and watering to prevent damping off and leggy seedlings.
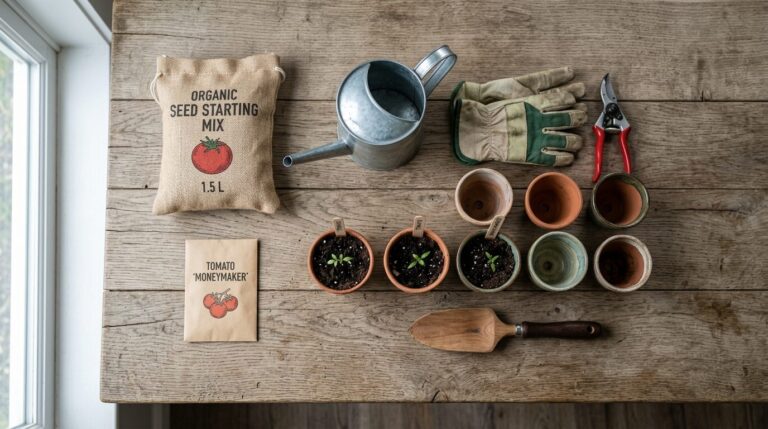
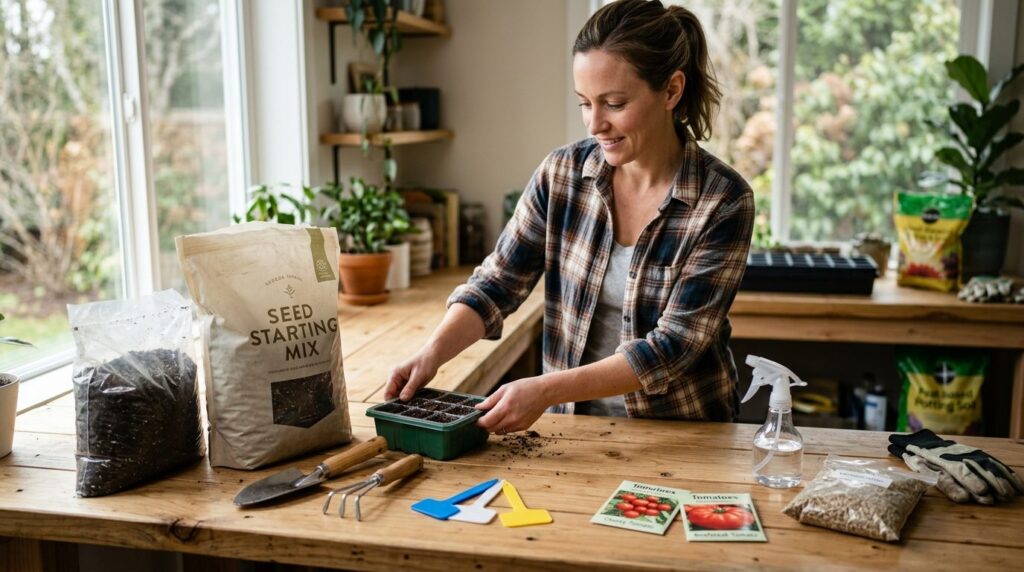
Gathering Your Seed Starting Supplies
Before you sow a single seed, assemble the materials that will give your tomato seedlings the best start. Each item plays a specific role in controlling the micro-environment that tomato seeds require for fast, uniform germination and vigorous early growth.
- 🌱 Tomato seeds: Choose varieties adapted to your USDA zone and growing season length. Determinate types mature faster and suit short seasons in zones 3 to 4, while indeterminate varieties thrive in zones 5 to 6 with longer frost-free periods.
- 🪴 Seed starting containers: Plastic cell trays, peat pots, or soil blocks. Containers must have drainage holes and be at least 5 cm deep to accommodate initial root growth without immediate transplanting.
- 🌿 Sterile seed starting mix: A soilless blend of peat moss, vermiculite, and perlite. Avoid garden soil, which harbours fungal pathogens that cause damping off in the warm, humid conditions of indoor seed starting.
- 🌡️ Heat mat with thermostat: Maintains substrate temperature at 21 to 27°C, the range that triggers germination in 5 to 7 days. Without supplemental heat, germination in a 18°C room can take 10 to 14 days and result in uneven emergence.
- 💧 Spray bottle or bottom watering tray: Bottom watering from a tray beneath the containers prevents surface moisture that encourages fungal growth on stems. A spray bottle is useful for initial moistening of the seed starting mix before sowing.
- 🔆 LED grow lights: Provide 5,000 to 7,000 lux at seedling height. Standard household bulbs deliver only 500 to 1,000 lux, far below the threshold needed to prevent leggy, weak stems.
Why the 6 to 8 Week Timeline Matters for Tomato Seedlings
The 6 to 8 week window is not arbitrary. It corresponds to the time required for a tomato seedling to develop 4 to 6 true leaves and a root system dense enough to survive transplanting without significant shock. After germination, the first leaves to appear are cotyledons, embryonic leaves that store energy from the seed. True leaves emerge 7 to 10 days later and begin photosynthesis. Each subsequent pair of true leaves increases the plant’s capacity to produce carbohydrates, which fuel root growth and stem thickening. By week 6, a healthy seedling has a stem diameter of 3 to 4 mm and roots that fill a 5 cm cell, ready to anchor in outdoor soil and resume growth within days of transplanting.
Seedling Physiology and Transplant Readiness
Transplanting too early, before the fourth true leaf, leaves the seedling dependent on limited root mass and vulnerable to wind, temperature swings, and competition from weeds. Transplanting too late, after 8 weeks indoors, risks root-bound plants in small containers, where circling roots reduce nutrient uptake and stunt growth even after transplanting. In Ontario’s zone 5b, where the average last frost is May 15, starting seeds on March 20 gives seedlings exactly 8 weeks to reach transplant size. In Alberta’s zone 3a, where frost persists until June 1, starting seeds on April 1 provides the same 8 week development period before outdoor planting.
Comparing Tomato and Pepper Seed Starting Timelines
Tomato seeds germinate and grow faster than pepper seeds, which is why peppers are started 8 to 10 weeks before the last frost, while tomatoes require only 6 to 8 weeks. Pepper seeds need 27 to 30°C for reliable germination and grow more slowly in the seedling stage, adding 2 weeks to their indoor timeline. Starting both crops at the same time results in tomato seedlings that outgrow their containers and become leggy before outdoor conditions are safe, while pepper seedlings are still small. Stagger your sowing: peppers first, tomatoes 2 weeks later.
Calculating Your Exact Start Date Based on Local Frost Patterns
Your last frost date is the average date in spring after which the probability of a killing frost (air temperature at or below 0°C) drops below 10 percent. This date varies by hundreds of kilometres across Canada and determines when it is safe to transplant tomato seedlings outdoors. To calculate your seed starting date, subtract 6 to 8 weeks from your local last frost date. Use the longer 8 week timeline if you are growing indeterminate varieties or live in a zone with cool spring temperatures that slow early growth.
Regional Frost Date Examples Across Canada
In Montreal, Quebec (zone 5a), the average last frost is May 10. Count back 8 weeks to arrive at March 15 as your seed starting date. In Vancouver, British Columbia (zone 8b), the last frost occurs around March 20, so start seeds in late January if you want large transplants, or early February for standard-sized seedlings. In Winnipeg, Manitoba (zone 3b), the last frost is typically May 25, placing your seed starting date around March 30. For Calgary, Alberta (zone 4a), with a last frost near May 20, start seeds on March 25. If you are unsure of your local frost date, consult Environment Canada climate normals or contact your provincial agriculture extension office for station-specific data.
Adjusting for Microclimates and Frost Protection
Urban gardens in Toronto or Ottawa often experience last frosts 7 to 10 days earlier than rural areas 50 km away, due to heat island effects. If you plan to use row covers or cloches to protect transplants, you can safely move your outdoor planting date 1 to 2 weeks earlier, which means starting seeds 1 to 2 weeks later indoors. Conversely, if you garden in a low-lying area prone to late cold air pooling, add 1 week to your last frost date and start seeds accordingly earlier.
Seed Starting Containers and Soil Mix Selection
The container and substrate you choose directly affect root development and the ease of transplanting. Tomato seedlings develop adventitious roots along buried stem tissue, a trait you can exploit during transplanting to create a deeper, more stable root system. Your initial container must be deep enough to support root growth for 6 to 8 weeks without becoming root-bound, yet small enough to fit under grow lights and on heat mats.
Plastic Cell Trays vs Peat Pots vs Soil Blocks
Plastic cell trays with individual 5 cm cells are reusable, inexpensive, and widely available at Canadian garden centres such as Home Hardware and Canadian Tire. They provide excellent drainage and allow you to monitor root development through the drainage holes. Peat pots are biodegradable and can be transplanted directly into the ground, reducing root disturbance, but they wick moisture away from the root zone if the pot rim is exposed above the soil line, and they decompose slowly in cool Canadian soils, sometimes restricting root growth. Soil blocks, formed with a blocking tool, eliminate containers entirely and promote air pruning of roots, which prevents circling and encourages a dense, fibrous root mass. However, soil blocks require more skill to form and maintain consistent moisture. For most home growers, plastic cell trays offer the best balance of cost, ease, and root health.
Seed Starting Mix Ratios and Sterility
A sterile, soilless mix prevents damping off, a fungal disease that kills seedlings at the soil line. Commercial seed starting mixes from brands like Pro-Mix or Sunshine Mix are pre-sterilized and contain 60 to 70 percent peat moss, 20 to 30 percent perlite, and 10 percent vermiculite. This ratio provides water retention without waterlogging and allows oxygen to reach roots. If you mix your own, pasteurize the components by moistening them and heating to 82°C for 30 minutes in an oven, then cooling before use. Avoid adding compost or garden soil, which introduce fungal spores and weed seeds that compete with tomato seedlings.
Temperature and Humidity Control During Germination
Tomato seeds are warm-season crops that originated in the Andean highlands, where daytime soil temperatures reach 21 to 27°C. At this temperature range, enzymes within the seed activate, breaking down stored starches into sugars that fuel embryo growth. Below 15°C, enzymatic activity slows dramatically, and germination either fails or takes 3 to 4 weeks, during which time the seed is vulnerable to rot. A heat mat with a thermostat is the most reliable tool for maintaining optimal substrate temperature, especially in Canadian homes where ambient indoor temperatures range from 18 to 20°C in spring.
Heat Mat Setup and Thermostat Calibration
Place the heat mat on a flat, heat-resistant surface away from water sources. Set the thermostat probe into the seed starting mix in one of the central cells, not touching the bottom of the container, to measure actual substrate temperature rather than air temperature. Set the thermostat to 24°C, the midpoint of the optimal range. Monitor the temperature for 24 hours before sowing seeds to ensure stability. If your heat mat lacks a thermostat, check substrate temperature with a soil thermometer twice daily and adjust the mat’s position or add insulation underneath to prevent overheating above 30°C, which can damage emerging radicles.
Humidity Management Before Emergence
High humidity (80 to 90 percent) during germination prevents the seed starting mix from drying out and keeps seed coats soft, which allows the radicle to emerge easily. Cover trays with a clear plastic dome or plastic wrap to trap moisture. Remove the cover as soon as cotyledons emerge, typically 5 to 7 days after sowing, to reduce humidity to 50 to 60 percent and prevent fungal growth on stems and leaves. In dry Canadian homes during winter heating season, a small humidifier near the seedling area can maintain this range without covering the trays.
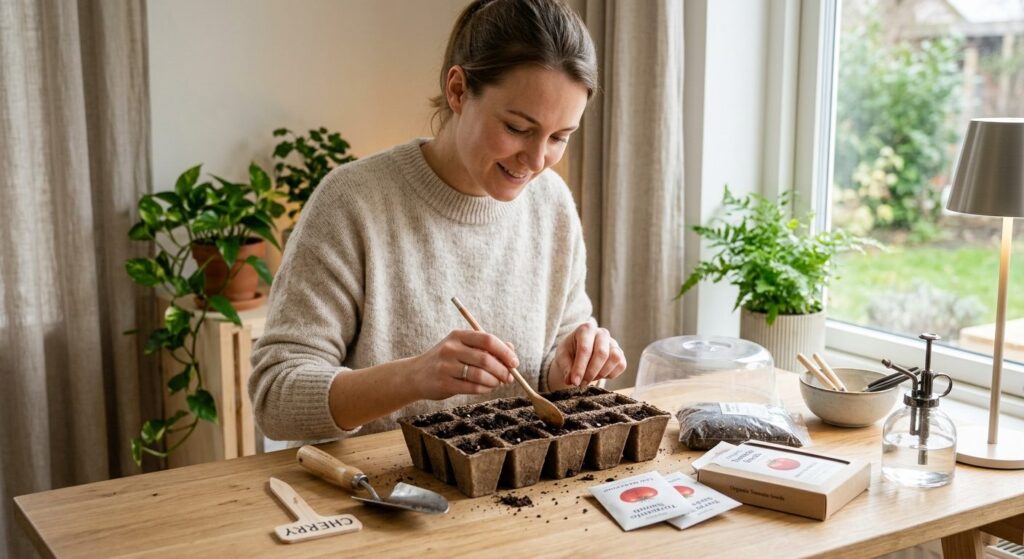
Step-by-Step Sowing Process for Tomato Seeds
Sowing tomato seeds at the correct depth and spacing ensures uniform emergence and minimizes competition for light and nutrients during the critical first weeks of growth. Each step below is designed to create the conditions that trigger germination and support healthy seedling development.
Step 1: Moisten the Seed Starting Mix
Pour seed starting mix into a large bucket or tray. Add water gradually, mixing with your hands, until the mix is evenly moist but not saturated. When you squeeze a handful, a few drops of water should appear, but the mix should not drip. This moisture level provides the water film that seeds need to imbibe and begin germination without creating anaerobic conditions that promote rot. Fill each cell or container to within 1 cm of the rim, pressing gently to eliminate large air pockets but avoiding compaction, which restricts root penetration. In Saskatchewan’s zone 3a, where indoor air is often very dry, you may need to add slightly more water to compensate for faster evaporation during the germination period.
Step 2: Sow Seeds at 6 to 8 mm Depth
Use a pencil or dibber to create a shallow hole 6 to 8 mm deep in the centre of each cell. This depth is twice the diameter of a tomato seed and allows the emerging shoot to push through the substrate without expending excessive energy, while still providing enough contact with moist mix to trigger germination. Place one or two seeds per cell. Sowing two seeds provides insurance against poor germination, and you can thin to the strongest seedling after emergence. Cover the seeds with a light layer of seed starting mix and press gently to ensure contact. Do not bury seeds deeper than 12 mm, as the cotyledons may exhaust their energy reserves before reaching the surface, resulting in failed emergence.

Step 3: Label Each Variety and Sowing Date
Use waterproof labels or a permanent marker to record the variety name and sowing date on each tray or cell. If you are starting multiple varieties with different days to maturity, labelling prevents confusion during transplanting and allows you to track which varieties perform best in your specific zone. For example, in Ontario’s zone 5b, you might sow an early determinate variety like ‘Manitoba’ on March 20 and a mid-season indeterminate like ‘Brandywine’ on March 27, giving the faster-maturing determinate a head start. Clear labelling also helps you identify any variety that shows poor germination or susceptibility to damping off, so you can avoid it in future seasons.

Step 4: Place Trays on Heat Mat and Cover
Set the filled trays on the heat mat and cover with a clear plastic dome or plastic wrap to maintain high humidity. Ensure the cover does not touch the soil surface, as condensation dripping onto the mix can create overly wet spots that encourage fungal growth. Place the entire setup in a location with stable ambient temperature, away from cold drafts from windows or exterior doors. Check daily for signs of germination. In Quebec’s zone 4a, where indoor temperatures can drop to 16°C overnight even in late March, the heat mat is essential to maintain the 24°C substrate temperature that ensures 5 to 7 day germination. Once cotyledons emerge, remove the cover immediately and move trays under grow lights.
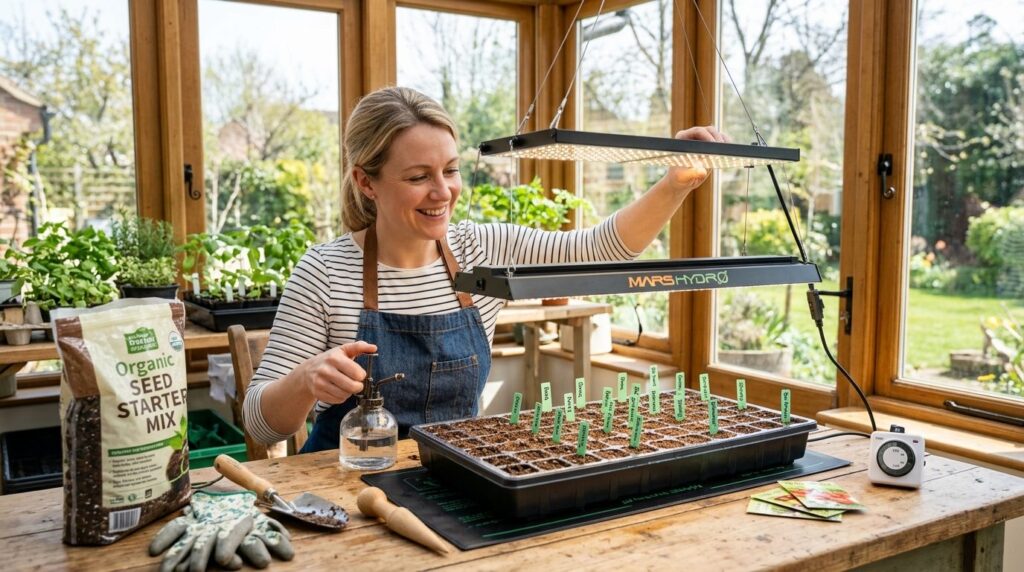
Lighting Requirements Once Seedlings Emerge
Light intensity and photoperiod are the primary factors that determine whether your tomato seedlings develop short, sturdy stems or tall, weak, leggy growth. Tomato seedlings require 5,000 to 7,000 lux at the leaf surface for 14 to 16 hours per day to drive photosynthesis at a rate that supports compact stem elongation and thick leaf tissue. Below 2,000 lux, stems elongate rapidly as the plant searches for brighter light, resulting in weak, spindly seedlings that flop over and are prone to breakage during transplanting.
LED Grow Light Positioning and Intensity
Position LED grow lights 10 to 15 cm above the tops of the seedlings. As the plants grow, raise the lights to maintain this distance, ensuring uniform light distribution across all leaves. Full-spectrum LED panels designed for seedlings typically deliver 5,000 to 7,000 lux at this distance when operated at full power. Measure light intensity with a lux meter or smartphone app to confirm adequate levels. In British Columbia’s zone 8b, where cloudy spring weather is common, even a south-facing window provides only 1,000 to 2,000 lux on overcast days, far below the threshold for healthy tomato seedlings. Supplemental grow lights are necessary regardless of window placement.
Photoperiod and Daily Light Integral
Run grow lights for 14 to 16 hours per day, using a timer to ensure consistency. This photoperiod mimics the long days of late spring and provides a daily light integral (DLI) of 12 to 16 mol per square metre per day, sufficient for rapid vegetative growth. Longer photoperiods (18 to 24 hours) do not significantly increase growth and may stress seedlings by preventing the dark period that plants use for cellular repair. Turn lights on at 6:00 AM and off at 8:00 or 10:00 PM to align with your household schedule. In Alberta’s zone 3a, where natural daylight is still short in early April, the full 16 hour photoperiod is critical to prevent leggy growth and ensure stocky, transplant-ready seedlings by early June.

Transplanting Seedlings into Individual Pots
When seedlings develop 2 to 3 true leaves, typically 3 to 4 weeks after germination, transplant them into individual containers at least 10 cm in diameter and 10 cm deep. This intermediate step before outdoor planting gives roots more space to expand and allows you to bury the stem up to the cotyledons, which stimulates the formation of adventitious roots along the buried stem tissue. These additional roots increase water and nutrient uptake and create a more stable anchor for the plant once it is moved outdoors.
Burying Stems to Encourage Adventitious Root Formation
Tomato stems have the unique ability to produce roots from any node or section of stem that is in contact with moist substrate. When you transplant, remove the seedling from its cell and bury the stem up to the first set of true leaves, or even up to the cotyledons if the stem is leggy. Fill the new pot with the same seed starting mix or a blend of 70 percent potting soil and 30 percent perlite. Firm the mix gently around the stem to eliminate air pockets. Within 7 to 10 days, new roots will emerge from the buried stem, effectively doubling the root mass and creating a sturdier plant. In Manitoba’s zone 3b, where wind is a constant challenge after transplanting outdoors, this deep planting technique significantly reduces the risk of young plants being uprooted or broken during the first weeks in the garden.
Watering and Fertilization After Transplanting
Water the transplanted seedlings from the bottom by placing pots in a tray of water and allowing the substrate to wick moisture upward until the surface is moist. This method prevents water from splashing onto leaves and stems, which can spread fungal spores. After the initial watering, allow the top 1 cm of substrate to dry before watering again, typically every 2 to 3 days depending on light intensity and ambient temperature. Begin fertilizing 1 week after transplanting with a dilute liquid fertilizer (half the label rate) formulated for seedlings, such as a 5-1-1 fish emulsion or a balanced 10-10-10 synthetic fertilizer. Apply every 7 to 10 days. In Ontario’s zone 5b, where seedlings remain indoors for 4 to 5 weeks after transplanting into larger pots, consistent fertilization prevents nutrient deficiencies that cause yellowing lower leaves and stunted growth.
Hardening Off Before Moving Plants Outdoors
Hardening off is the gradual acclimatization of indoor-grown seedlings to outdoor conditions: full sun, wind, temperature fluctuations, and lower humidity. Seedlings grown under artificial lights have thin cuticles and delicate cell walls that are easily damaged by direct sunlight and wind. A 7 to 10 day hardening off period thickens the cuticle, strengthens cell walls, and triggers the production of protective pigments such as anthocyanins, which give leaves a purple tint and protect against UV damage.
Day-by-Day Hardening Off Protocol
Day 1 to 2: Place seedlings outdoors in full shade for 1 to 2 hours in the morning or late afternoon, when temperatures are mild and wind is calm. Bring them back indoors before midday heat or evening cold. Day 3 to 4: Increase outdoor time to 3 to 4 hours, still in full shade. Day 5 to 6: Move seedlings to a location with dappled sunlight or morning sun (2 to 3 hours of direct sun) for 4 to 6 hours. Day 7 to 8: Expose seedlings to 6 to 8 hours of sun, including midday sun, and leave them outdoors overnight if nighttime temperatures remain above 10°C. Day 9 to 10: Leave seedlings outdoors full time, in the location where they will be planted. In Quebec’s zone 4a, where late May nights can still drop to 5°C, delay the overnight step until temperatures stabilize above 10°C, or cover seedlings with row cover fabric on cold nights.
Monitoring for Transplant Shock Symptoms
During hardening off, watch for signs of stress: wilting in full sun, leaf edges turning brown or crispy, or purple discolouration spreading from leaf veins. Mild wilting that resolves within an hour after moving seedlings back to shade is normal and indicates the plant is adjusting. Persistent wilting or leaf burn means you have increased exposure too quickly. Move seedlings back to shade for an additional day before trying again. In Alberta’s zone 3a, where intense sun and low humidity are common in late May and early June, hardening off may take the full 10 days, and you may need to provide temporary shade cloth (30 to 50 percent) for the first few days after transplanting into the garden.
Diagnosing and Preventing Damping Off and Leggy Growth
Two problems dominate indoor tomato seed starting: damping off, a fungal disease that kills seedlings at the soil line, and leggy growth, the elongation of stems due to insufficient light. Both are preventable with attention to substrate moisture, air circulation, and light intensity.
Damping Off: Causes and Visual Symptoms
Damping off is caused by soil-borne fungi, primarily Pythium and Rhizoctonia, that thrive in warm, wet conditions. Infected seedlings develop a water-soaked lesion at the base of the stem, which constricts and turns brown or black. The stem collapses, and the seedling topples over. Once damping off appears, there is no cure. Remove infected seedlings immediately to prevent spores from spreading to healthy plants. Damping off is distinct from overwatering, which causes yellowing leaves and slow growth but does not produce the characteristic stem lesion. In Ontario’s zone 5b, where humid spring weather increases fungal pressure, damping off is most common in the first 2 weeks after germination, when seedlings are most vulnerable.
Preventing Damping Off with Bottom Watering and Air Circulation
Use sterile seed starting mix and clean containers to eliminate fungal spores before sowing. Water from the bottom by placing trays in a shallow tray of water, allowing the substrate to wick moisture upward. This keeps the soil surface dry, which inhibits fungal growth. Provide air circulation with a small fan set on low speed, positioned to move air gently across the tops of the seedlings without causing them to sway. Air movement dries the soil surface and strengthens stems by stimulating the production of thicker cell walls. Avoid overwatering. Allow the top 1 cm of substrate to dry before watering again. In British Columbia’s zone 8b, where indoor humidity can reach 70 percent in spring, a fan is essential to prevent damping off and other fungal issues such as powdery mildew on older seedlings.
Correcting Leggy Seedlings with Increased Light and Stem Burial
Leggy seedlings have elongated stems, widely spaced nodes, and pale green leaves. The primary cause is insufficient light intensity, below 2,000 lux. To correct leggy growth, immediately increase light intensity by lowering grow lights to 10 cm above the seedlings or moving trays to a brighter location. If stems are already 10 to 15 cm tall with only 2 to 3 true leaves, transplant seedlings into deeper containers and bury the stem up to the first true leaves. This converts the leggy stem into a root zone and allows the plant to resume compact growth. In Manitoba’s zone 3b, where overcast March weather reduces natural light, leggy growth is common if growers rely solely on window light. Installing LED grow lights as soon as cotyledons emerge prevents the problem entirely.
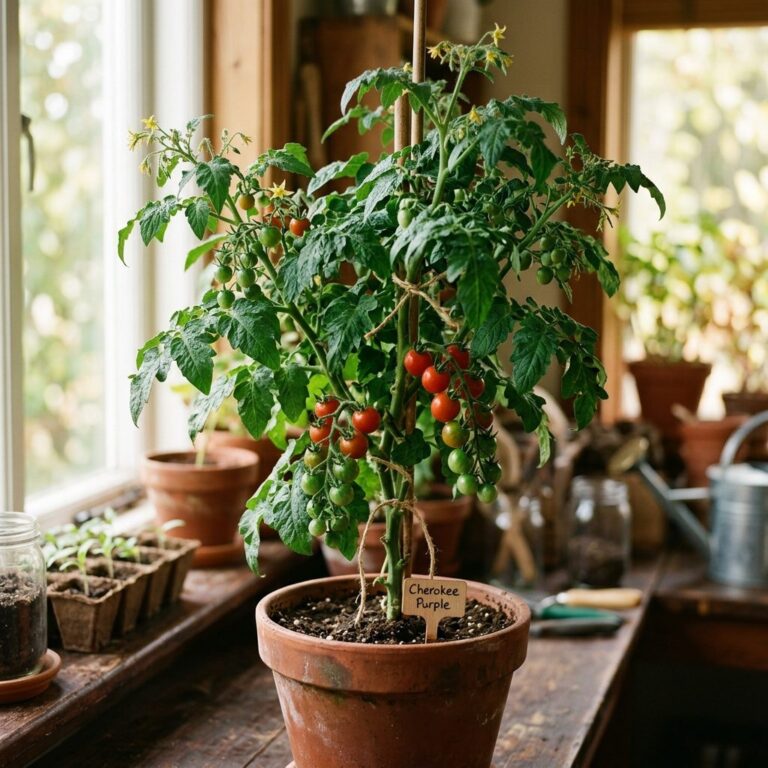
Tomato Varieties That Perform Best in Cold-Climate Growing Seasons
Variety selection is as important as seed starting technique for Canadian growers. Determinate varieties grow to a fixed height, set all their fruit within a 2 to 3 week window, and are ideal for short-season zones where early frost threatens. Indeterminate varieties grow continuously until frost, produce fruit over a longer period, and suit zones with 90 or more frost-free days. Choosing varieties bred for cold climates or with short days to maturity ensures you harvest ripe fruit before autumn frost ends the season.
Determinate Varieties for Zones 3 to 4
In USDA zones 3 to 4, which cover northern Alberta, Saskatchewan, Manitoba, and northern Quebec, the frost-free period is 90 to 110 days. Determinate varieties that mature in 55 to 70 days are essential. ‘Manitoba’, developed by Agriculture Canada, matures in 58 days and produces 100 to 150 gram fruit on compact 60 cm plants. ‘Sub-Arctic Plenty’ matures in 55 days and tolerates cool soil temperatures, making it suitable for direct sowing outdoors in early June. ‘Glacier’ matures in 58 days and sets fruit at temperatures as low as 10°C, which is critical in regions where summer nights remain cool. These varieties are available from Canadian seed companies such as West Coast Seeds and Veseys.
Indeterminate Varieties for Zones 5 to 6
In USDA zones 5 to 6, which include southern Ontario, southern Quebec, and the Okanagan Valley in British Columbia, the frost-free period is 120 to 150 days, long enough for indeterminate varieties that mature in 70 to 80 days. ‘Brandywine’, an heirloom indeterminate, produces 300 to 500 gram fruit with rich flavour in 78 days. ‘Black Krim’, a Russian heirloom, matures in 75 days and tolerates variable summer weather. ‘Sungold’, a cherry tomato, matures in 65 days and produces hundreds of sweet, orange fruit per plant, ideal for extended harvest. In Ontario’s zone 5b, these varieties thrive when started indoors on March 20 and transplanted outdoors after May 15, giving them 120 days to produce before the first autumn frost in mid-September.
Regional Variety Trials and Adaptation
Provincial agriculture departments and university extension programs conduct variety trials that identify the best-performing tomatoes for local conditions. In Quebec, the Institut de recherche et de développement en agroenvironnement (IRDA) publishes annual trial results comparing yield, disease resistance, and flavour of dozens of varieties. In Alberta, the Crop Diversification Centre South tests varieties for tolerance to cool nights and short seasons. Consult these resources before ordering seeds to ensure you select varieties with proven performance in your zone. In British Columbia’s zone 8b, where late blight pressure is high due to wet summers, choose varieties with resistance to Phytophthora infestans, such as ‘Defiant’ or ‘Mountain Magic’, to avoid crop loss.
Regional Timing and Adaptation Across Canadian Provinces
Seed starting dates and transplanting strategies vary significantly across Canada due to differences in frost dates, day length, and summer temperatures. Tailoring your approach to your specific province and USDA zone maximizes seedling health and outdoor performance.
Quebec and Ontario: Balancing Late Spring Frosts and Humid Summers
In Quebec’s zone 4a and Ontario’s zone 5a, start tomato seeds indoors between March 15 and March 25 for transplanting outdoors after May 15 to May 20. Use a heat mat to maintain 24°C substrate temperature during germination, as indoor temperatures in late March average 18 to 20°C. After transplanting into individual pots, maintain 14 to 16 hours of light per day with LED grow lights to prevent leggy growth during the short days of early April. Begin hardening off on May 5, giving seedlings 10 days to acclimatize before transplanting. In these regions, humid summer weather increases the risk of late blight and early blight, so choose resistant varieties and ensure good air circulation around plants by spacing them 60 cm apart in the garden.
Prairies: Managing Short Seasons and Temperature Extremes
In Manitoba’s zone 3b, Saskatchewan’s zone 3a, and Alberta’s zone 4a, start seeds indoors between March 25 and April 5 for transplanting outdoors after May 25 to June 1. The short frost-free period (90 to 110 days) requires determinate varieties that mature in 55 to 65 days. Use row covers or cloches for the first 2 weeks after transplanting to protect seedlings from wind and cool nights, which can drop to 5°C even in early June. In these zones, intense summer sun and low humidity increase water demand. Mulch around transplants with 5 cm of straw or shredded leaves to conserve soil moisture and maintain even soil temperature, which prevents blossom end rot caused by calcium uptake disruption during water stress.
British Columbia: Leveraging Mild Coastal Climates and Managing Rain
In British Columbia’s zone 8b, particularly the Lower Mainland and southern Vancouver Island, start seeds indoors in late January or early February for transplanting outdoors in late March or early April. The mild climate and long growing season (150 to 180 frost-free days) allow for large indeterminate varieties and extended harvest. However, wet spring and summer weather increases the risk of fungal diseases such as late blight and powdery mildew. Grow seedlings under LED lights for the full 6 to 8 weeks, as overcast weather provides insufficient natural light even in south-facing windows. After transplanting outdoors, provide overhead protection such as a simple hoop house or rain cover to keep foliage dry and reduce disease pressure. In the Okanagan Valley (zone 6a), where summers are hot and dry, start seeds in mid-March for transplanting in mid-May, and prioritize consistent irrigation to prevent blossom end rot and fruit cracking.
Starting tomato seeds indoors 6 to 8 weeks before your last frost date is the foundation of a successful cold-climate tomato harvest. By controlling substrate temperature, light intensity, and moisture during germination and seedling growth, you produce stocky, vigorous transplants that establish quickly outdoors and begin fruiting weeks earlier than direct-sown plants. Calculate your exact start date based on local frost patterns, use sterile seed starting mix and bottom watering to prevent damping off, and provide 5,000 to 7,000 lux of light to avoid leggy growth. Transplant seedlings into larger pots and bury stems to stimulate adventitious root formation, then harden off for 7 to 10 days before moving plants outdoors. Choose determinate varieties for zones 3 to 4 and indeterminate varieties for zones 5 to 6, and consult provincial variety trials to identify the best performers for your region. With these techniques, Canadian growers from Quebec to British Columbia can enjoy abundant, flavourful tomatoes every summer, regardless of their short growing season.