| Method | Success Rate | Root Visibility | Time to Transplant | Best Season |
|---|---|---|---|---|
| Water propagation | 92-98% | Full visibility | 3-4 weeks | Spring/Summer |
| Soil propagation | 85-90% | No visibility | Immediate | Year-round indoors |
| Rooting hormone + soil | 94-96% | No visibility | Immediate | Year-round indoors |
Propagating Epipremnum aureum, commonly called pothos or devil’s ivy, succeeds because of the plant’s natural epiphytic habit and the presence of meristematic tissue at every node. Unlike most houseplants that struggle in water long-term, pothos cuttings can root and even thrive indefinitely in aquatic environments, making water propagation both reliable and visually rewarding. Whether you choose water or soil propagation depends on your climate zone, indoor temperature stability, and whether you want to observe root development in real time. Across Ontario (zone 5b), Quebec (zone 4a-5b), and British Columbia (zone 8a-9a), spring offers the fastest rooting timelines due to increased daylight hours and ambient warmth, though indoor propagation works year-round with proper temperature control.
Why Nodes Are the Single Critical Factor in Pothos Propagation
The node is the small bump or joint on the stem where leaves and aerial roots emerge. Inside each node lies dormant meristematic tissue, a cluster of undifferentiated cells capable of initiating new root growth when exposed to moisture and warmth. Without a node, a pothos cutting has no physiological capacity to generate roots, regardless of water quality, light intensity, or rooting hormone application. This is why cuttings taken between nodes, containing only stem tissue, inevitably rot or desiccate without rooting.
Identifying Nodes on Your Pothos Stem
Nodes appear as raised rings or bumps along the stem, typically 8-15 cm apart on mature vines. Each node may already have a small aerial root protruding, a brown nub 1-3 mm long. If no aerial root is visible, the node is still functional. The key anatomical marker is the point where a leaf petiole attaches to the stem. The node sits directly at or just below this attachment point. On variegated cultivars like ‘Marble Queen’ or ‘N’Joy’, nodes are easier to spot due to colour contrast at the stem joint.
Why Aerial Roots Accelerate Rooting Success
Cuttings with visible aerial roots root 40-60% faster than those with dormant nodes alone. Aerial roots contain pre-formed root primordia, embryonic root structures that rapidly elongate when submerged in water or buried in moist substrate. In Alberta (zone 3a-4a), where indoor heating reduces humidity below 25% in winter, cuttings with aerial roots maintain higher success rates because the existing root tissue tolerates drier air during the critical first week. If your mother plant lacks aerial roots, mist the lower stem sections daily for two weeks before cutting to stimulate primordium development.
Node Anatomy and Auxin Distribution
The plant hormone auxin concentrates at nodes and promotes cell division in meristematic tissue. When you sever a cutting below a node, auxin accumulates at the cut surface, triggering callus formation within 48-72 hours. Callus is a pale, swollen tissue that precedes root emergence. In water propagation, callus appears as a white or cream-coloured ring around the node. In soil, you cannot see it, but resistance to gentle tugging after 10-14 days indicates callus and early root development. Cuttings taken mid-stem, far from nodes, lack sufficient auxin concentration to initiate this cascade.
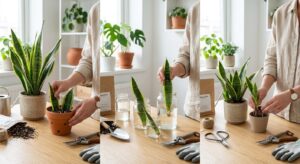
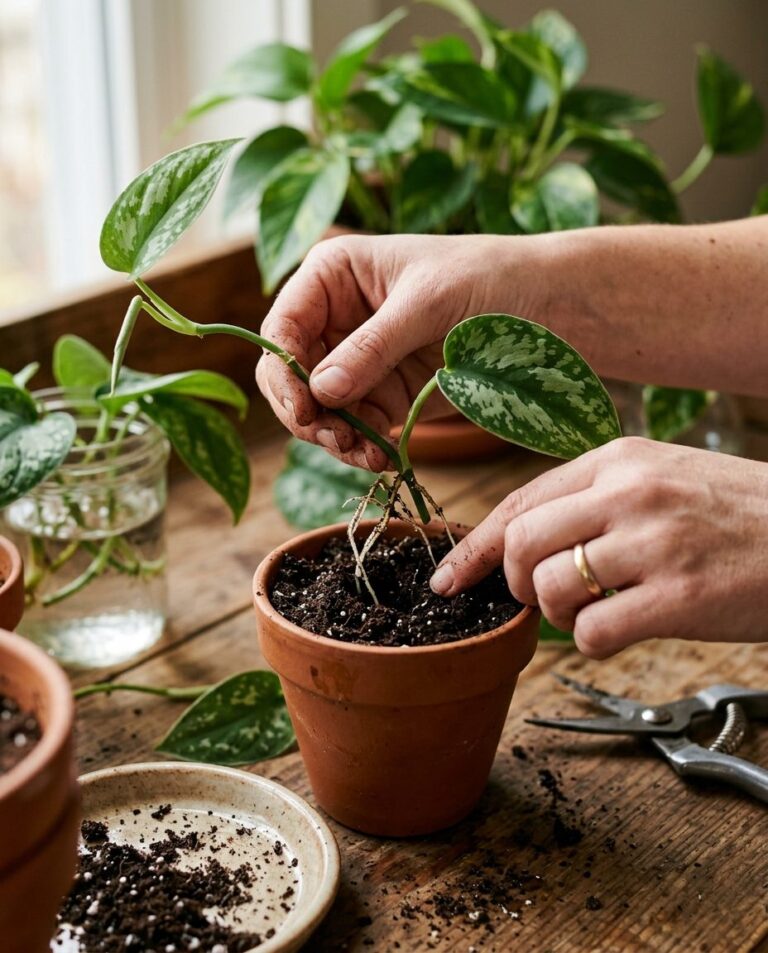
Selecting and Harvesting Healthy Pothos Cuttings for Maximum Success
Choose stems that are actively growing, indicated by light green or yellowish new leaves at the tip and firm, turgid tissue throughout. Avoid woody, brown stems from the base of mature plants, as these root more slowly and are prone to bacterial soft rot in water. Each cutting should include at least one node and one leaf, though two nodes with two leaves increases success rates to above 95%. In Manitoba (zone 2b-3b), where indoor temperatures drop to 16-18°C at night in winter, select cuttings from the upper third of the vine where auxin levels are highest.
Cutting Technique and Tool Sterilization
Use sharp, sterilized pruning shears or a razor blade cleaned with 70% isopropyl alcohol. Make a clean cut 1-2 cm below the node at a 45-degree angle to maximize the surface area for water or substrate contact. Ragged cuts from dull blades crush stem tissue, creating entry points for bacteria. If propagating multiple cuttings, sterilize the blade between cuts to prevent cross-contamination. Remove the lowest leaf if it would sit below the waterline or soil surface, as submerged foliage decays rapidly and clouds water or introduces pathogens.
Optimal Cutting Length and Leaf Load
Cuttings 10-15 cm long with 2-3 leaves balance photosynthetic capacity and water uptake. Longer cuttings with 4+ leaves lose more moisture through transpiration than the developing roots can replace, leading to leaf yellowing and wilting. Conversely, single-node cuttings with one small leaf root successfully but grow more slowly in the first month. In Saskatchewan (zone 2a-3b), where low indoor humidity accelerates transpiration, trim large leaves by one-third to reduce water loss while maintaining enough leaf area for energy production.
Timing Your Harvest for Faster Rooting
Take cuttings in the morning when stems are fully hydrated. Pothos vines lose 10-15% of their turgor pressure by late afternoon, and cuttings harvested at that time take an extra 3-5 days to initiate roots. Spring and early summer offer the fastest rooting timelines due to longer photoperiods and warmer ambient temperatures. In Nova Scotia (zone 6a-6b), cuttings taken in April root in 18-22 days in water at 20-22°C, compared to 28-35 days for the same cuttings in November at 16-18°C.
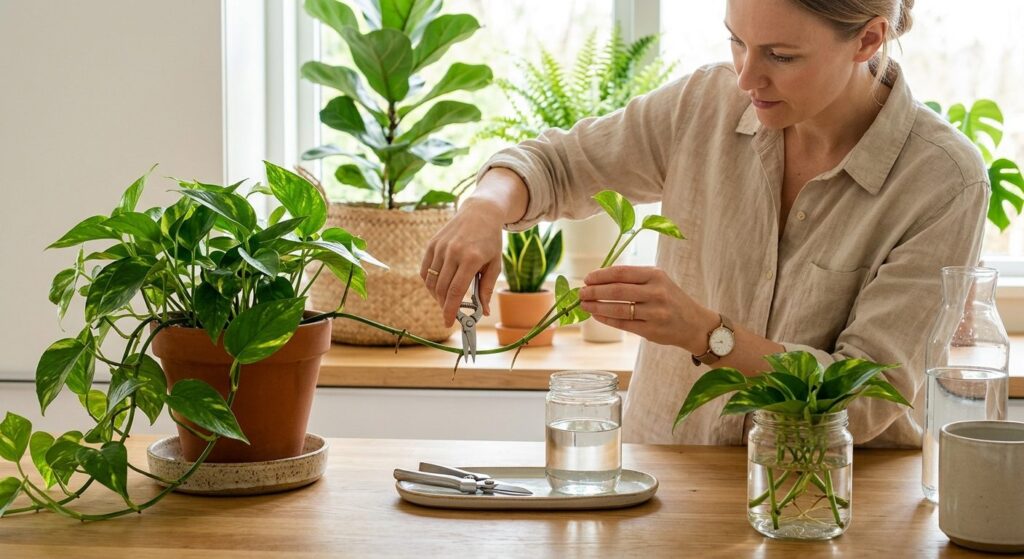
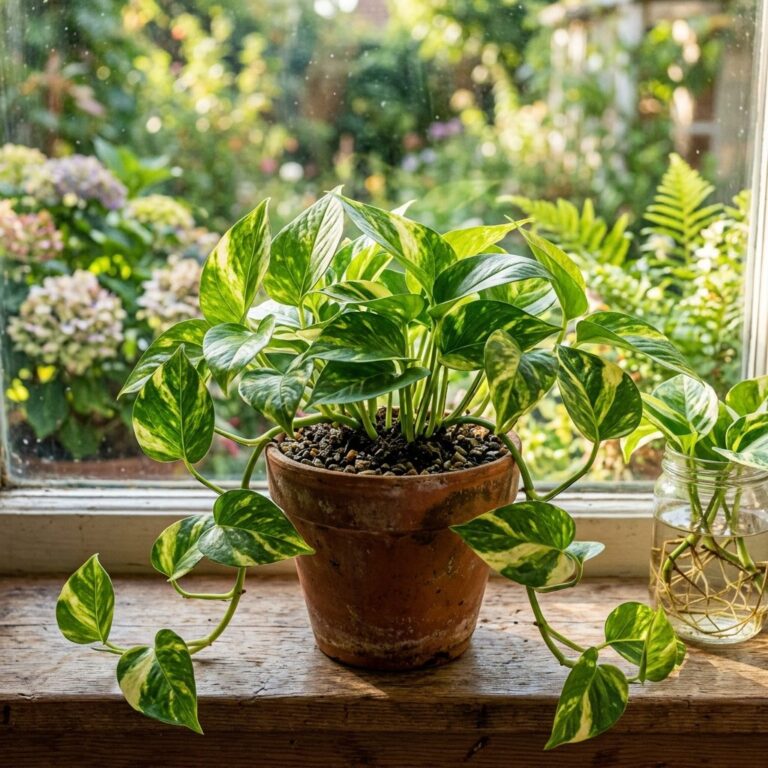
Water Propagation: The Visual Method for Tracking Root Development
Water propagation allows you to monitor root emergence, length, and health in real time, making it ideal for beginners and for diagnosing problems early. The method works because pothos is naturally adapted to high-moisture environments in its native Southeast Asian rainforests, where it climbs trees and absorbs water through aerial roots. Success depends on maintaining dissolved oxygen levels, preventing bacterial growth, and providing stable warmth. In British Columbia (zone 8a-9a), where tap water often contains chloramine, let water sit uncovered for 24 hours or use filtered water to avoid root tip browning.
Container Selection and Water Quality
Use a clear glass jar or vase 10-15 cm tall to observe root development. Opaque containers hide problems like algae growth or root rot until symptoms appear on foliage. Fill the container with room-temperature water (20-24°C), submerging the node but keeping leaves above the waterline. Rainwater, distilled water, or dechlorinated tap water all work well. Avoid softened water, which contains sodium ions that interfere with root cell elongation. Change the water every 5-7 days to replenish oxygen and remove metabolic waste products exuded by the cutting.
Light and Temperature Requirements
Place the container in bright, indirect light equivalent to 200-400 foot-candles, measured 30 cm from the cutting. Direct sun heats the water above 26°C, promoting bacterial growth and algae blooms. In Quebec (zone 4a-5b), a north-facing window provides stable light without temperature spikes, while south-facing windows require sheer curtains or placement 1-2 metres back from the glass. Maintain ambient air temperature at 20-24°C for optimal rooting speed. Below 18°C, root initiation slows by 40-50%, and below 15°C, cuttings enter dormancy and may rot before rooting.
Preventing Algae and Bacterial Contamination
Green water indicates algae growth, which competes for oxygen and nutrients. Wrap the lower half of the container in opaque paper or cloth to block light from the water while leaving the upper portion clear for observation. If algae appears, discard the water, rinse the container with diluted hydrogen peroxide (1 part 3% peroxide to 10 parts water), and refill with fresh water. Bacterial soft rot, identified by a foul smell and slimy, translucent stem tissue, requires immediate cutting removal. Trim away the rotted section, re-cut 1 cm above the nearest healthy node, re-sterilize tools, and start in fresh water.
Soil Propagation: Direct Planting Without the Transplant Shock
Soil propagation eliminates the transplant step and the osmotic stress that water-rooted cuttings experience when moved to substrate. Roots grown in water develop thin cell walls optimized for aquatic environments, while soil-grown roots have thicker walls and more root hairs for nutrient absorption. Direct soil propagation produces cuttings that establish faster and show less leaf yellowing in the first two weeks. The trade-off is that you cannot see root development, so diagnosis of failure requires destructive inspection or waiting for visible growth.
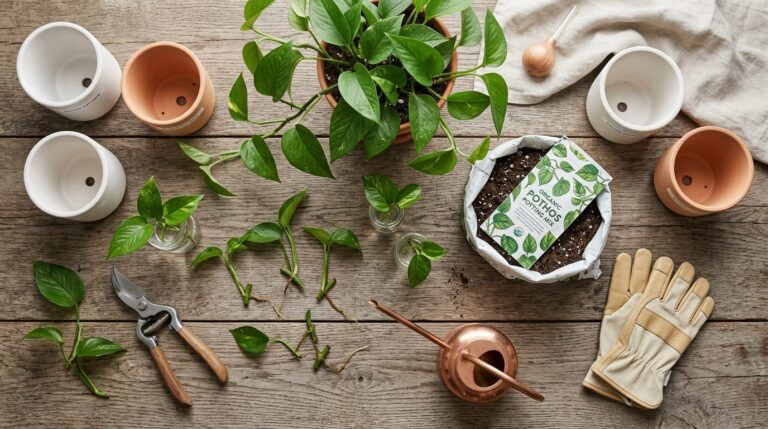
Substrate Recipe for Fast Drainage and Aeration
Mix 50% peat moss or coco coir, 30% perlite, and 20% fine orchid bark by volume. This ratio provides moisture retention without waterlogging, and the bark chunks create air pockets that prevent root suffocation. Pre-moisten the mix until water drips slowly when squeezed, then fill a 10-12 cm pot with drainage holes. In Ontario (zone 5b), where municipal water is hard (200-300 ppm calcium carbonate), rinse peat-based mixes before use to flush excess salts that inhibit root initiation. Alternatively, substitute coco coir, which has lower baseline EC (electrical conductivity) and better rewetting properties.
Planting Depth and Firming Technique
Insert the cutting so the node sits 2-3 cm below the surface, with at least one leaf above the soil. Firm the substrate gently around the stem to eliminate air pockets, which cause the node to dry out. Do not compress the mix tightly, as this reduces aeration and slows root growth. Water thoroughly until liquid drains from the bottom, then allow the top 1 cm to dry before watering again. Overwatering is the primary cause of soil propagation failure, as saturated substrate depletes oxygen and promotes anaerobic bacteria.
Humidity Dome and Moisture Management
Cover the pot with a clear plastic bag or humidity dome to maintain 70-80% relative humidity around the cutting. This reduces transpiration and prevents wilting while roots develop. Remove the cover for 10-15 minutes daily to refresh air and prevent fungal growth. In Alberta (zone 3a-4a), where winter indoor humidity drops to 20-25%, a dome is essential for success. After 14-18 days, when new growth appears at the stem tip, gradually increase ventilation over 5-7 days to acclimate the cutting to ambient humidity.
Rooting Hormone Application for Higher Success Rates
Dip the cut end in 0.1% IBA (indole-3-butyric acid) rooting powder before planting to increase success rates from 85-90% to 94-96%. Tap off excess powder so only a thin coating remains. The hormone stimulates callus formation and accelerates root initiation by 3-5 days. In Manitoba (zone 2b-3b), where cooler indoor temperatures slow natural auxin activity, rooting hormone compensates and ensures reliable results even at 18-20°C. Avoid liquid or gel formulations, which can oversaturate the node and cause rot.
Root Development Timeline: What to Expect Week by Week
Root development follows a predictable sequence, though timing varies with temperature, light, and node maturity. Understanding the visual and tactile milestones helps you distinguish normal progress from failure. The timeline below assumes water propagation at 20-22°C in bright, indirect light. Soil propagation follows a similar schedule but without visible confirmation until roots emerge from drainage holes or new foliage appears.
Days 1-5: Callus Formation
The cut surface swells slightly and develops a pale, cream-coloured callus. This tissue is the foundation for root emergence. No roots are visible yet. In Saskatchewan (zone 2a-3b), where indoor temperatures may hover at 18-19°C in spring, callus formation takes 6-8 days instead of 3-5. If the cut end turns brown or black, bacterial rot has begun. Remove the cutting, trim to healthy tissue, and restart in fresh water.
Days 6-12: Root Primordia Emergence
Tiny white bumps, 1-2 mm long, appear on the callus or directly from the node. These are root primordia, the earliest stage of root development. Over the next 3-4 days, they elongate into thin, white roots. Cuttings with pre-existing aerial roots skip this stage and produce roots 5-7 days earlier. In Nova Scotia (zone 6a-6b), cuttings propagated in April show primordia by day 8, while November cuttings may take until day 14.
Days 13-21: Root Elongation and Branching
Primary roots reach 3-5 cm in length and begin branching into secondary roots. This is the optimal transplant window for water-rooted cuttings. Roots longer than 8 cm become brittle and break easily during transplant, causing setbacks. In soil propagation, roots at this stage may protrude from drainage holes. Gently tug the stem; firm resistance indicates a functional root system. In British Columbia (zone 8a-9a), where mild spring temperatures allow outdoor propagation in sheltered locations, this stage arrives 2-3 days earlier than indoors.
Days 22-28: Root Maturation and New Growth
Roots develop a fine network of root hairs, visible as a fuzzy coating on the root surface. The cutting produces a new leaf at the stem tip, signalling that the root system can support active growth. At this point, water-rooted cuttings can remain in water indefinitely if you prefer hydroponic cultivation, or they can be transplanted to soil. In Quebec (zone 4a-5b), cuttings propagated in May reach this stage by late June, while those started in October may take until mid-November.
Transitioning Water-Rooted Cuttings to Soil Successfully
Water-rooted cuttings experience osmotic stress when moved to soil because soil water has higher solute concentration than pure water. This stress causes temporary wilting, leaf yellowing, and slowed growth. Successful transition requires gradual acclimation to reduce shock. In Ontario (zone 5b), where indoor heating in spring can drop humidity to 30-35%, acclimation is critical to prevent leaf loss.
Pre-Transplant Root Conditioning
One week before transplanting, add 1/4-strength liquid fertilizer (diluted to 50-75 ppm nitrogen) to the water. This increases solute concentration gradually, conditioning roots to the higher nutrient levels in soil. Change this enriched water every 3 days. In Alberta (zone 3a-4a), where tap water EC is already elevated (300-400 µS/cm), skip this step or use distilled water with fertilizer to avoid over-concentration.
Transplanting Technique to Minimize Root Damage
Fill a 12-15 cm pot with the same substrate mix used for direct soil propagation (50% peat or coco, 30% perlite, 20% bark). Pre-moisten the mix thoroughly. Create a planting hole deep enough to accommodate the roots without bending or coiling them. Lower the cutting into the hole, spread the roots gently, and backfill with substrate. Firm lightly and water until drainage occurs. Avoid pressing roots against the pot sides, as this causes tip dieback and slows establishment.
Humidity Acclimation Protocol
Immediately after transplanting, cover the pot with a clear plastic bag or humidity dome to maintain 70-80% humidity. Over the next 10-14 days, gradually increase ventilation. Start by opening the dome for 1 hour on day 1, then 2 hours on day 2, doubling daily until the dome is removed entirely by day 10-12. This slow acclimation allows the roots to develop thicker cell walls and more efficient water-uptake mechanisms. In Manitoba (zone 2b-3b), extend this period to 14-16 days if indoor humidity is below 25%.
Post-Transplant Watering and Light Adjustment
Water only when the top 2-3 cm of substrate feels dry to the touch. Overwatering in the first two weeks causes root rot, as the thin-walled water roots are vulnerable to anaerobic conditions. Reduce light intensity by 20-30% for the first week to minimize transpiration demand. In Saskatchewan (zone 2a-3b), move the cutting 50-70 cm farther from the window or add a sheer curtain to diffuse light. After 10-14 days, when new growth resumes, return to normal light levels.
Why Your Pothos Cuttings Are Rotting, Yellowing, or Refusing to Root
Propagation failures follow predictable patterns, and diagnosis depends on observing the timing, location, and appearance of symptoms. Most problems stem from temperature extremes, water quality issues, or node damage during cutting. In Nova Scotia (zone 6a-6b), where spring temperatures fluctuate widely, cuttings near drafty windows experience temperature swings that delay rooting or trigger rot.
Bacterial Soft Rot: Slimy, Translucent Stems
Bacterial soft rot appears as a foul-smelling, slimy section of stem that feels mushy when pressed. The tissue turns translucent or dark brown. This occurs when water temperature exceeds 26°C, when the cutting was taken with dirty tools, or when the node was damaged during harvest. Remove the cutting immediately to prevent bacteria from spreading to other cuttings in the same container. Trim to healthy tissue, sterilize tools, and restart in fresh water. In British Columbia (zone 8a-9a), where south-facing windows can heat water to 28-30°C on sunny spring days, move containers back from the glass or use opaque outer sleeves to insulate the water.
Leaf Yellowing Without Root Rot
If leaves turn yellow but the stem remains firm and roots are developing normally, the cutting is experiencing nitrogen deficiency or excessive transpiration. Water-rooted cuttings have no access to nutrients, so older leaves yellow as the plant reallocates nitrogen to new growth. Add 1/4-strength liquid fertilizer to the water to supply 50-75 ppm nitrogen. If yellowing persists, reduce light intensity by 20-30% to lower transpiration demand. In Quebec (zone 4a-5b), where indoor humidity drops to 30% in heated homes, mist the foliage daily or place a shallow water tray nearby to raise local humidity.
No Root Development After 21 Days
If no callus or roots appear after three weeks, the cutting lacks a functional node, the water temperature is too low, or the cutting entered dormancy. Inspect the stem carefully: the node should be a visible bump or ring. If the cutting was taken mid-internode, it will never root. If a node is present, check water temperature. Below 18°C, root initiation slows dramatically. Move the container to a warmer location (20-24°C) or use a seedling heat mat set to 22°C. In Alberta (zone 3a-4a), where basement temperatures hover at 15-17°C, place cuttings on a high shelf near the ceiling where warm air accumulates, or use a heat mat to raise substrate or water temperature.
Root Tip Browning and Stunted Growth
Brown, brittle root tips indicate chlorine or chloramine toxicity, low dissolved oxygen, or high mineral content in tap water. If your municipality uses chloramine (common in Ontario and British Columbia), dechlorinators designed for aquariums are required, as chloramine does not evaporate like chlorine. Alternatively, switch to distilled or rainwater. If roots are crowded in a small container, dissolved oxygen depletes rapidly. Move cuttings to a larger container or reduce the number of cuttings per jar to 2-3 maximum.
Propagation Speed Comparison: Water vs. Soil and When to Choose Each
Water and soil propagation each offer distinct advantages depending on your goals, climate, and experience level. Water propagation provides visual confirmation of root development and a higher success rate (92-98%) but requires a transplant step that stresses the cutting. Soil propagation eliminates transplant shock and produces more robust roots but offers no visibility, making troubleshooting harder. In Manitoba (zone 2b-3b), where indoor temperatures are stable year-round, soil propagation works reliably. In Saskatchewan (zone 2a-3b), where temperature fluctuations are common, water propagation allows you to monitor progress and move cuttings to warmer spots as needed.
Time to Transplant-Ready Roots
At 20-22°C, water-rooted cuttings develop transplant-ready roots (3-5 cm long with secondary branching) in 18-22 days. Soil-rooted cuttings reach equivalent development in 20-26 days, though you cannot see the roots without disturbing the cutting. Adding rooting hormone to soil cuttings reduces this to 17-21 days, matching water propagation speed. In Nova Scotia (zone 6a-6b), where spring temperatures are mild, outdoor propagation in a sheltered, shaded spot (16-20°C) takes 24-30 days for water and 28-35 days for soil.
Success Rate by Method and Season
Water propagation achieves 92-98% success in spring and summer, dropping to 85-90% in winter when indoor temperatures fall below 20°C. Soil propagation without rooting hormone averages 85-90% success year-round, rising to 94-96% with hormone application. In Quebec (zone 4a-5b), winter propagation (December-February) benefits from heat mats under soil containers or placing water jars on top of refrigerators, where waste heat maintains 22-24°C.
Choosing Based on Root Quality and Long-Term Growth
Soil-rooted cuttings develop thicker roots with more root hairs and establish faster once potted, showing new leaf growth 7-10 days earlier than transplanted water-rooted cuttings. However, water-rooted cuttings can remain in water indefinitely as hydroponic specimens, making water propagation ideal if you want to display roots in decorative vases. In Ontario (zone 5b), where hard water (200-300 ppm) causes mineral buildup on roots, soil propagation avoids this issue entirely. In British Columbia (zone 8a-9a), where soft water (50-100 ppm) is common, water propagation works exceptionally well with minimal root-tip browning.
Propagation in Low-Light Conditions
If your only available space receives less than 150 foot-candles (dim indirect light), water propagation is more reliable because you can move the container easily to track available light throughout the day. Soil-rooted cuttings in low light are prone to fungal growth on the substrate surface and slower root development. In Alberta (zone 3a-4a), where winter daylight lasts only 7-8 hours, supplement with a 15-watt LED grow light placed 30 cm above cuttings to extend the photoperiod to 12-14 hours and accelerate rooting by 20-30%.